Getting Started
Welcome to our documentation on using the Nuki REST API.
Terms of Use
Section titled “Terms of Use”The usage of our REST API is governed by the API Terms of Use.
API Reference
Section titled “API Reference”Already familiar with our API and want to get started? Take a look at our dedicated OpenAPI specification and request playground.
View API ReferenceSetting up
Section titled “Setting up”The Nuki REST API can only be used with real Nuki devices connected to a Nuki Web account. You will need to install your smart lock and have it connected with your Nuki Web account before you can begin developing.
The follow steps need to be completed to use the REST API:
- Install your Nuki device using the smartphone apps
- Connect your Nuki device to Nuki Web
- Activate the REST API
- Create your API Token (or alternatively, apply for the Advanced API to use OAuth 2)
1. Install your device
Section titled “1. Install your device”First of all, set up your Nuki devices using the smartphone apps.
App Store (iOS) Google Play Store (Android)Detailed guides for mounting your Smart Lock and Opener can also be found in our help center.
2. Connect your device to Nuki Web
Section titled “2. Connect your device to Nuki Web”Your device must be connected to your Nuki Web account to use the REST API. If your device is already connected, you can skip ahead to ”Activate the REST API”.
If you don’t have a Nuki Web account, you can create one following the steps below.
From within the smartphone app, select your Nuki device, and click on “Settings”. Afterwards, tap on “Features & Configuration”, then “Nuki Web”.
You will then be guided through the steps to create your Nuki Web account. If you need a detailed guide, please refer to this help center article.
If you already have a Nuki Web account, you can easily connect new devices to your existing account. Follow the same steps above through the app settings and you will be prompted if you want to add the device to your existing account.
3. Activate the REST API
Section titled “3. Activate the REST API”You can now switch to your desktop or laptop browser, and navigate to https://web.nuki.io.
Log in with the Nuki Web credentials you created in the previous step.
In the main menu, head to “API”. Here you will need to accept the Terms of Use for our API before proceeding.
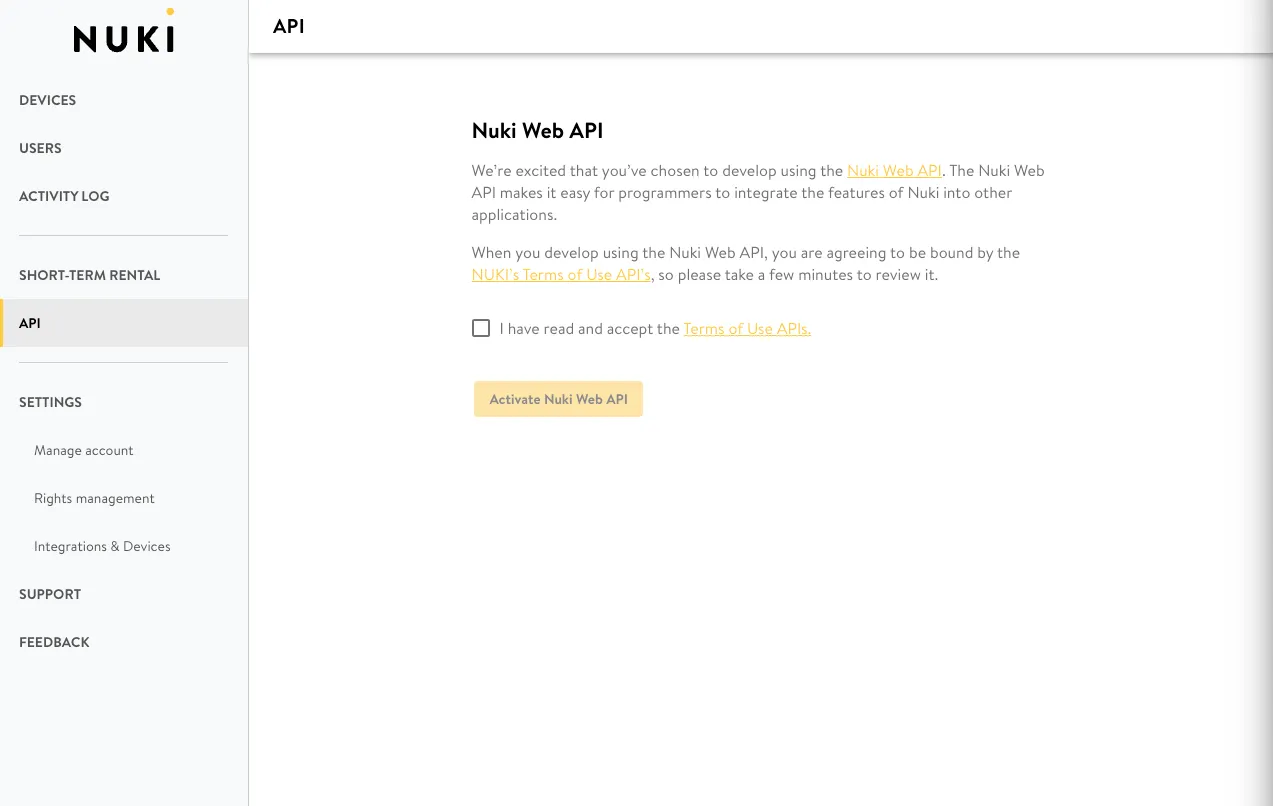
After you have activated the API, you will see the option to create API Tokens, as well as optionally apply for the Advanced API.
4. Optional: Advanced API
Section titled “4. Optional: Advanced API”If you would like to use the OAuth 2 Authorization Code, or webhooks, you will need to have access to the Advanced API.
To access the Advanced API, you will already need to have followed the steps above on how to “Activate the REST API”. After which, you will see the option to apply for the Advanced API in Nuki Web.
When you apply, you will be required to fill out a form with certain details.
During this process, there are a few types to choose from…
- You intend on using the API for the purpose of short-term rental
- You will be able to use the OAuth 2 Authorization Code and Webhooks
- You intend on using the API for the purpose of smart home integration
- You will be able to use the OAuth 2 Authorization Code and Webhooks
- You intend on using the API for the purpose of providing healthcare services
- You will be able to use the OAuth 2 Authorization Code and Webhooks
- You intend on using the API for a purpose other than the previous types
- You will be able to use the OAuth 2 Authorization Code and Webhooks
- You intend on using the API for a purpose other than the previous types
- You will be able to use the OAuth 2 Authorization Code
If you selected a type that offers webhook functionality, you will also need to define your Webhook URL. If you do not currently have a webhook server setup, there are many free services available which offer a webhook inbox to help during your development. You will need to switch to your correct webhook server before offering your integration to customers. This can be updated within your Nuki Web account.
After your application has been processed, you will see an additional tab within Nuki Web, where you’ll find your Advanced API credentials and a few other options, such as the ability to choose which webhook events should be triggered.
The Advanced API operates via the same base URL and endpoints as the standard API. You will, in addition to the standard endpoints, also gain access to the /advancedapi endpoint, which offers a few extra functionalities.